Thursday, July 23, 2015

Color

Once again I find myself pedaling madly to catch up the blog.  I guess with the arrival of summer that is par for the course.  As I write this our house continues to transform into being a home.  We've had great evenings sitting around our fire pit, cooking out in the backyard and enjoying the warm summer evenings.  Plus, we adopted two cats who have become a source of near constant entertainment for just the cost of some litter and food. 

Paint has since gone onto the walls due to the persistent work of my beautiful and artistic wife.  She has chosen such warm and wonderful colors to greet us as we arrive home after a long day at work.

The above two photos are in the living room
Please don't ask me the names of the colors however.  That is the perview of the painter who I am sure will rattle off a bunch of things about color values and tones.  I happily nod my head and appreciate that we have developed a most excellent division of jobs that plays to our strengths.  I do know this though, she is a big fan of Benjamin Moore paint and I have to say that it is really great quality paint and worth the extra money.
Front partial wall separating dining from living room. 

The media room (I have a story about that sofa for later)

The fireplace with shiplap set against the new color.  We are still debating painting the brick a deep chocolate color.

I think the one thing I notice about the colors Elizabeth has chosen is that they change through the day with the outside light.  It is a bit like being in a new house as the day wears on.  In general I don't think the pictures capture how well things have come out but perhaps as the rooms come together with less chaos of tools and boxes and random furniture I can post some better pics. -TS

Sunday, June 21, 2015

Shiplap

Wow how time flies.  Once again I'm way behind on posts though progress on the house has been great.  In any event, today is father's day, and I think it is only right that we recognize those that have imparted to us their mastery of the home improvement way.  Those budda's of the work bench. The swami's of the hammer swing.  The king's of carpentry...You get the idea.

So we left off with shiplap.  As I previously posted we had no luck getting the type of product we sought.  Elizabeth was able to come up with an alternative, however, after some internet research.  So off we went to Lowes where we had them rip 4 x 8 foot sheets of utility plywood into 6 inch strips.  In order to obtain that classic spacing look between boards we used pennies to separate boards before nailing.  In the end we are very happy with the look.  It creates a bit of a cottage effect that breaks up the sheet rock wall look and it pairs well with the bungalow style of our house.  Plus, it cost us less than $100 to do the wall and the area over the fireplace.  
 To tie it into the living room I rebuilt the frame around the chimney and faced it with the shiplap as well.
That brown you see poking out from under the shiplap is the paper backing of fiberglass insulation I placed in the space around created by the framing.  It hadn't previously had insulation and I can only imagine it was a major heat sink for the house.
Once the shiplap was up the trim needed to be added both to the chimney area as well as the walls and baseboard.  I was able to salvage some of the trim I had removed though most of it had so many layers of sloppily applied pain that it wasn't worth re-hanging.  The trim for around the fireplace was courtesy of the wood that came when I tore out the drop ceilings. 

So with the walls up and the trim coming together its was time for a little clean-up.  We could finally start getting some of that paper off the wood floors that had gone down for protection. Plus, the walls were ready for paint. Elizabeth has a real eye for color so I turned her loose, and as the upcoming posts will show she has really brought things back together. 


Tuesday, June 2, 2015

Task completion

So after almost two months since we took possession of the house I feel like some  spaces are starting to come back together and some critical fixes are done.  One of the major things we knew we had to do going into all this was to update the electric.  The house was on 100 amp service with at least 70% of the house being old nob and tube and the plan was to upgrade to 200 amp and run romex to replace the old stuff.  Given that you can't safely insulate around nob and tube it leaves the house vulnerable to heating and cooling issues.

On a recommendation from a friend we hired a local solo electrician by the name of George Thompsen.  George really took the time to listen to what we wanted and made suggestions so we could stay within the budget.  Having opened up some of the interior walls made things much easier for fishing wires.  Initially I wanted to be more hands on with the electrical but with a full time job and all the other work needing to be done there weren't enough hours in the day.

Part of the old Nob and Tube system

Some of the new Romex going into an exposed wall
I was finally able to finish up the flashing around the chimney.  My friend Kevin loaned me a rope and harness so I could properly anchor and secure myself while working on the roof.  It doesn't look like it but that roof has quite a pitch.  I used a tar flashing system that integrates fiber glass mesh and is applied right to the shingles and chimney.  It worked pretty well and based on my quality control checks it appears to be working.   Thetop picture shows the up-slope side of the chimney before application.

The photo above shows how I used duct tape to create a clean edge when removed and the next one shows the results. 
While simultaneously finishing these projects we were dealing with, and still are, a partially clogged drain in our kitchen.  At some point we'll get around to snaking it but for now we are getting by, particularly since we had a work tub installed in the basement so we had a place to clean tools and pain brushes.  We were going to let the plumber snake the drain until we got the estimate.  We decided it was better to have the work tub and we would just make do until we tear out the kitchen and put in new plumbing.

With the electrical roughed in, the sheet-rock work could begin.  We hired Finish Line Drywall on a recommendation from George.  Ryan, the owner, has been great to deal with and we are very happy with the work.

The wall to the right, visible in the upper picture, was intentionally left clean of drywall so we could do shiplap.  A lot of people aren't familiar with the term shiplap though likely they have seen it.  It used to be an inexpensive way to finish walls when people couldn't afford lathe and plaster.  Instead they would hang strips of boards with a slight gap between them to allow for expansion.  The problem I found though, was that it was impossible to get true shiplap on the west coast.  After a lot of research Elizabeth struck on what someone else had done when they faced the same issue.  Take a look at the pictures and then I'll tell you how we did it in the next post.  Plus I'll include some pics of Elizabeth's amazing painting and the eye catching colors she chose. 

Lastly, my apologies to those of you waiting for this update.  We have been trying to keep some balance between work, remodeling and having fun.  The weather has been great and we have really enjoyed getting out fishing and hiking and spending time with good friends. 


Thursday, May 14, 2015

What goes up...needs to stay up

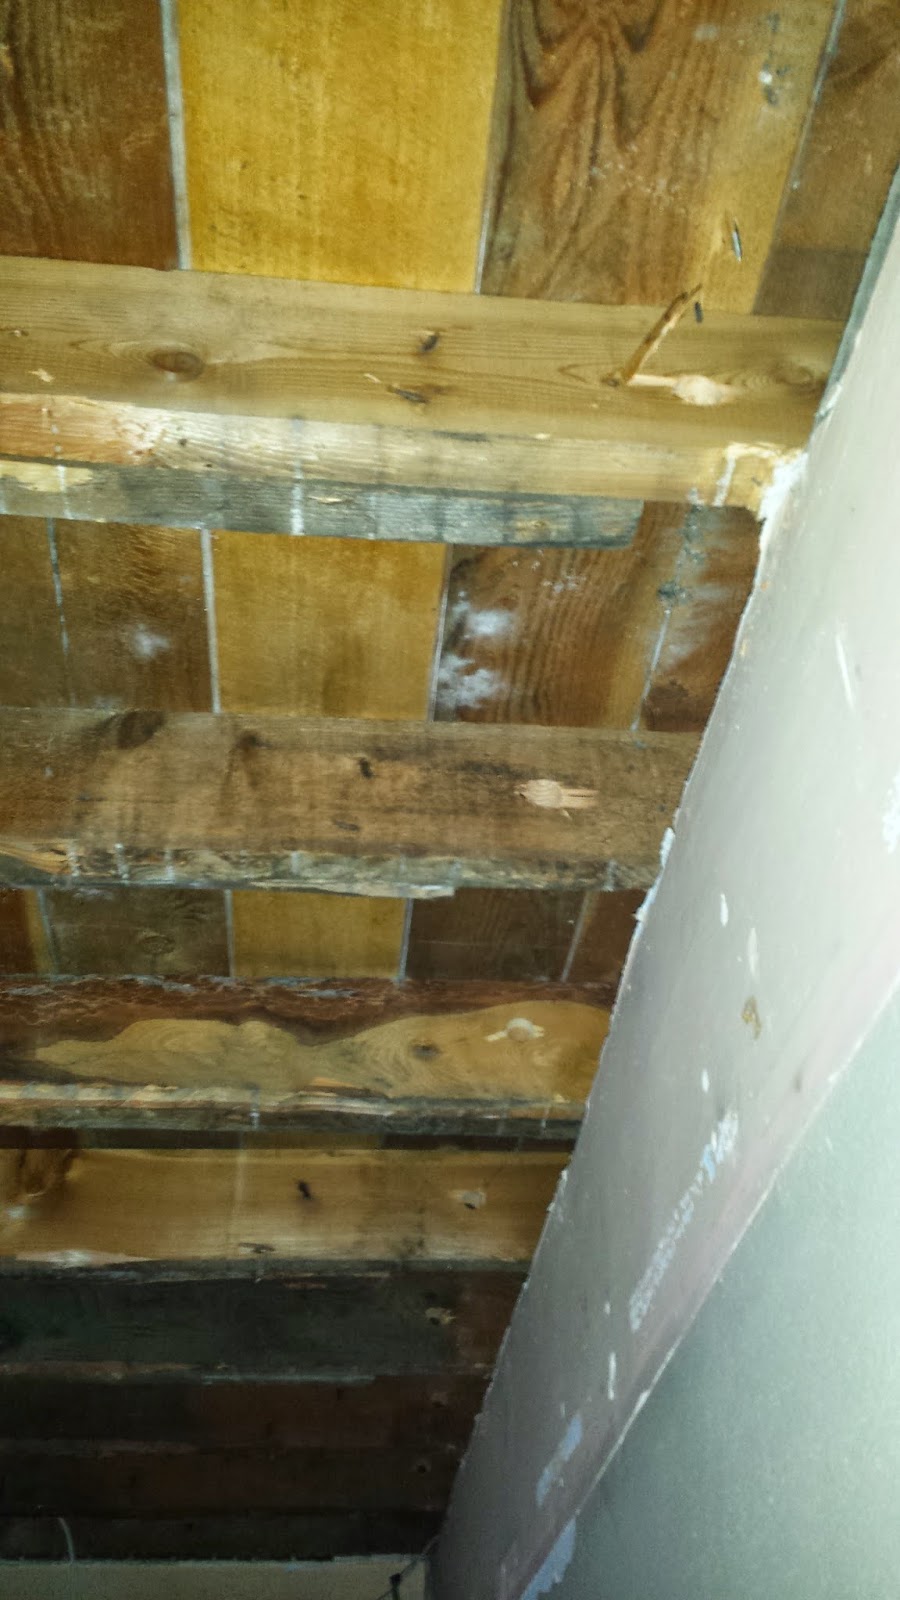
So as it turns out tearing down the drop ceiling not only exposed the water issue around the fireplace but also revealed that nine of the ten ceiling joists in the living room were not sitting on the upper plate of the load bearing wall.  Instead they had simply married them to the corresponding joists coming from the other side of the house with large nails and called it good.  I can't fathom why they would have done this though I suspect it may have had something to do with saving money and the fact that the second floor was probably used as an unfinished attic for storage only.
Amazingly the ceiling didn't show signs of sagging and neither did the roof line but it needed a fix.  Using 2x6's and bolts I set about marrying the joists.  Now I'm sure that some engineering types would say that to achieve true structural stability you have to extend the new boards "x" distance and so on but I had to just go with my gut on this.  Plus I was working around the electrician and didn't want to delay his work and the sheet rock was scheduled to go up in less than a week and I had other issues to tackle. 

With the new boards married I had to drill additional holes for the electrical lines to run through but overall the job went smoothly.  Using the clamps allowed me to position things properly and get a snug fit when the bolts were tightened.  Plus, since I was working alone, I wasn't fumbling with the boards while trying to tighten the nuts.


Once this was done I could turn my energy to the dry rot around the fireplace.  I did a lot of thinking about how to best tackle it.  Knowing I would need to prop joists and jack some of them back into position to level things I waited the week until after Elizabeth and I had moved her over from Seattle.

So the picture at the right gives you an idea of what we started with.  First we cut some 2x4's the right length and positioned them under the floor joists. Next, using a sawzall we cut away the 2x6 that lay against the chimney.  You can see a little part of it at the left side of the picture.  We also removed the 2x4's running vertically along the chimney because the upper wood on one of them, the diagonal  lying one, was full of rot.

With the rotted wood removed we cut a new 2x6 piece for along the fireplace.  It was a challenge to slide back in around the existing joists and a lip created by the fireplace brick and required the right amount of brute force, pounding and deft positioning to get back in. Once positioned, we used the scissor jack from my car to jack the joists back into position, level them, and affix them to the 2x6 using metal brackets.  The next few pictures show it pretty well. I also put Kilz paint on a few board ends just for good measure in case there was any impending "rot creep" that wanted to occur.


Once the joists were affixed I added back one of the 2x4's along the right hand side building a "skeleton" to anchor it.  This would allow us to have anchor points for the sheet rock and the shiplap we plan to add to to the front.  In the end I think it came out well and we had it all put together in time foe the sheet-rockers to get in and start doing their thing.

Sunday, May 10, 2015

The gift that keeps on giving; Part 2

So, when we left off I had just found a cancer lurking in our house.  A cancer in the form of water damage that had penetrated a large area around the fireplace.  Immediately I suspected the culprit was at the roof so I dragged the ladder out and went to take a look.

Sure enough I found the problem.  Despite having a roof that was only 4 years old the roofers had done nothing to update worn out and twisted flashing that was pulling up from its anchors and just inviting the rainwater and snow melt inside.

Back inside I used the crowbar to start ripping down the damaged lathe and plaster.  In the process soiled and compressed insulation began to hang from between the joists and a mix of blown fiberglass and vermiculite showered down (more on that later).  What I found around the fireplace inside the house was not at all good but at this point I was really happy I had decided to tear down that drop ceiling.  I could only imagine sitting in our neatly arranged living room some evening only to look up and see a water stain forming.
 
Luckily the dry rot did not extensively affect the floor joist though it had essentially destroyed the cross support that abutted the fireplace and tied the joists together.  This would need to be removed and replaced with a new 2 x 6.  In addition the joists were not level and would need to be jacked back into position and re-tied to the 2 x 6. 


The other thing I found here was that there was no insulation in the space around the fireplace and I could see right outside through gaps in the external clapboard.  This would need to be sealed and then have fiberglass insulation stuffed into the space as this is fire resistant, though we plan an insert with a new liner so there won't be much heat conduction.
It's rather amusing how in the past they would stuff old insulation into a crack and crevasses to insulate.  If you look closely you can it stuffed along the top plate of the outside wall where the rafters meet (Left).  It comes right out but it literally crumbles in your hand and rains down onto the floor. Our electrician found at least a half-dozen old intact newspaper magazines from the 1930's as well in the knee wall spaces of the attic too.  At some point we plan to frame up and display a copy of the Saturday Evening Post from March 1931!
 
So in the next installment I show how we tackled the issue of the dry rot support and tied the joists back together.


Thursday, May 7, 2015

The gift that keeps on giving; Part I


So a few days after I had moved into the house and Elizabeth had gone back to Seattle I was having a conversation with one of the neighbors.  "You know" she said, "I think there are beams above that drop ceiling in your living and dining rooms."

Elizabeth and I suspected we had hidden high ceilings as I had noted that in a pantry room and an old closet that was now a bathroom we had 9 foot ceilings while in the rest of the house they were around 8 feet.  Plus, in the dining and living room there were these '70s ugly click together tiles and we had thought about tearing them out.

Well, that was all it took.  There was no furniture in the house yet and it would only be me living in the house for the first month so I figured it was time to do some investigating.  I busted out one of the tiles and poked my head up through.  No beams but as suspected, 9 foot ceilings hidden away.

Tearing out the tiles was easy.  The framework that supported them took a little more doing but by the time I finished I had a ton of reclaimed 2 x 4's as well as 1 x 2's and 1 x 4's.  Plus, I recycled a can full of nails which have come in very handy and saved us money.   Clearly I am my parents son I guess.

Framework in the dining room hiding the higher ceiling

So I was rolling right along and feeling pretty good about this.  Unfortunately areas of plaster on the walls were damaged removing the framework.  Knowing that we had to have a major overhaul of the electrical system since we still had the old knob and tube running through most of the house it made sense to just start opening some walls to facilitate the upgrade.  Then we could just re-sheet rock.


All was going well until I tore out the the drop ceiling in the living room and discovered a rather large area of water damage right in front of the fireplace.  I certainly hadn't seen this coming and it only affirmed my belief that house inspections are a costly expense that yield little useful information.


Tuesday, May 5, 2015

Time for tile

Nothing like moving some boxes into your new space, fantasizing about what form the rooms will take and then taking a nice shower to rinse the grime off after a long drive from Seattle to Spokane.  So it went with Elizabeth's arrival.  As she ducked in to enjoy a little lather I went into the basement to get...wet?

Why suddenly was I getting sprayed?  I don't recall a shower in our basement.  Hmmmm....

Looking up it quickly became obvious I had another thing to add to the fix list.  Only this one needed to be done sooner rather than later.  It seemed that whomever set the tub and did the tile and grout work wasn't exactly on their game.  Upon closer inspection I found gaps both in the tile as well as around the tub edges which simply allowed water to wick directly into the basement.  Luckily for us I had gone into the basement and immediately found the smoking gun and it was a relatively easy fix with some grout and silicone caulk.

In the end the bathroom will probably be a tear out and do over.  It has enough water damage in the sub-floor that I don't want to have the tub someday just drop through the floor.  For now however it all appears to be functioning well and we don't have to drive to the YMCA to take a shower.