Yep, I took a little hiatus from the blog posts because it was a quiet winter and nice to step back from the major house projects. We spent time skiing, getting together at the holidays and Elizabeth changed jobs. I did a few things, like some patch concrete work in the basement, which is still ongoing. Also, I built a bench for out front entrance area. All in all a good time to recharge for the big daddy project that we have had going on this month.
I thought I would start with a little recap as to where things stand before we get into the kitchen remodel. Below are some pics of the living room and dining area before they became draped in plastic and equal parts dust.
 |
| Bob the cat chillin' in front of the new gas insert fireplace. |
|
|
 |
| Looking into the Living Room from the Dining area. Those are the old oak floors. The new color really brightens the space too. The interior decorating is a long term work in process. |
|
 |
| Looking into the Dining room. Note the far wall, that abuts the kitchen and will be removed as part of the renovation of the kitchen. | | |
|
|
|
After many months of planning including combing magazines, looking at countless online layouts and drafting up many possible layouts for our new kitchen we were ready to roll. We opted to go with Vanguard General Contracting here in Spokane. We had already worked with one-half of the team, George Thompsen, who is an electrician, and were very pleased with his work. Given the size and scope of this type of project we didn't feel we could pull it off without professional help. We sat down with George and his partner Ryan and reviewed our plans. We welcomed their input so that we could maximize the use of the space.
The plan was we would handle the demo and they would come in and put it all back together. We had a 20 yard roll-off dumpster placed right outside the kitchen window to maximize the efficiency of the process and set to work.
Emma offered to come help us on a part of her spring break and, I guess because she didn't want to feel left out, Kate flew out from NYC too. It was great having them here to help and it just added a more festive air to the process. They did a fantastic job of rigging plastic, ripping down lathe and plaster, pulling out nails and getting up multiple layers of old linoleum flooring.
Once the kitchen and pantry was cleaned out of all food, dishes, pots etc we tore into getting out the cabinets.


 |
| Kate and Emma removing doors and hardware |
 |
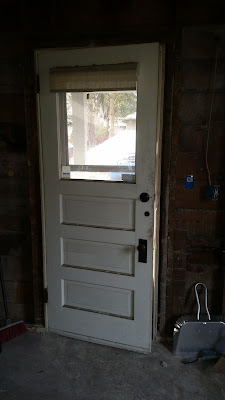
| Looking into the pantry before the cabinets were removed and the door into the pantry was torn out to make for a more fluid and open space. |
|
 |
| Cabinets removed and looking at the bare wall that abuts the dining room. This would be the last wall to come out in an effort to try and contain some of the dust. |
|
|

Here Elizabeth is tearing into that old lathe and plaster. Amazingly we found that sometime in the past someone had taken the time to blow in cellulose insulation. Hopefully they did the whole house but the only way to tell will be to use a thermal imager camera at some point to inspect for gaps.
 |
| Getting right down to the studs. |
 |
Looking through into the kitchen from the dining room with the wall partly removed.

With most of the wall out we had to remove the old cribbing and chimney that connected in a stove that has long since been in the kitchen. Initially I thought there was only a short section of 2-3 feet of brick. However, as we opened things up we discovered a chimney extending to the roof line that had been boxed in and hidden when they remodeled the second floor years ago. The chimney was also full of old soot and it just rained down and drifted through the entire space as I hit it to bust up the bricks.
A big pile of bricks that
formed up as I busted up the section of chimney boxed in on the second
floor. It was slow going working in a cramped space with a small sledge
hammer and a crowbar. With bricks above me I had to be careful not to
have wall of them cascade down on me and crush a finger, my hand or
bounce back into my face.
Cribbing and chimney out the space really opened up.
 |
A view with the wall removed. Now we gain a lot more light from the large bay window in the dining room.
Lastly we had to rip out the ceiling. Initially we planned to leave this but in the end it made it easier and faster to do the wiring (read saving money!) and the look would be cleaner when the new sheet rock went on.
In the next post we'll pick up with the floors and show the space is starting to come back together.


